
Taking care of a car’s aesthetics is a favorite hobby for many gearheads. There’s nothing quite like the feeling of stepping back and seeing your car look just as clean and sharp as you’ve always envisioned. However, despite all the mods and regular washes, time eventually takes its toll. One of the most common aging signs on any vehicle is foggy, yellowed headlights.
This happens because modern cars use transparent polycarbonate (plastic) lens covers. While this is a cost-effective, durable, and safe manufacturing method, it comes with one major flaw: prolonged exposure to UV rays, engine heat, and harsh weather eventually degrades the plastic. The characteristic result is an ugly yellowish tint. Not only does this ruin your car’s looks, but it also severely impacts functionality—dimming your light output and making night driving significantly more dangerous.
Old vs. New: Why Does This Happen?
Older cars used actual glass for their headlight lenses. Because of this, UV degradation wasn't an issue unless the glass physically shattered and lost its seal. Modern polymer lenses, on the other hand, inevitably oxidize and yellow over time. Of course, due to safety regulations, weight reduction, and lower manufacturing costs, glass headlights are virtually extinct today. Therefore, yellowing is simply unavoidable.
My Experience & A Budget-Friendly Fix
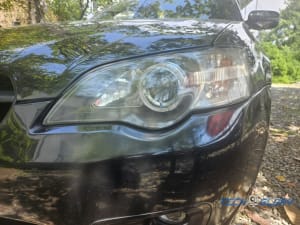
Today, I want to share how I restored my headlights to a near-perfect condition using a very simple DIY process. Keep in mind that the final result depends heavily on the initial condition and age of your lenses, but if you follow these steps closely, the transformation will amaze you.
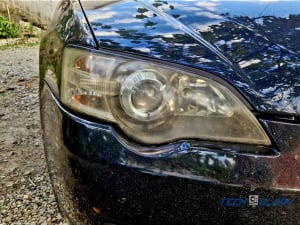
My car’s headlights are 22 years old and have been polished multiple times in the past. But simple polishing wasn't solving the root issue. From the factory, headlights come with a protective UV-resistant clear coat. Once that coat fades away, the bare plastic is left completely unprotected. Because I didn’t realize this initially, my headlights would turn yellow again just two weeks after a basic polish—an incredibly frustrating waste of time and money.
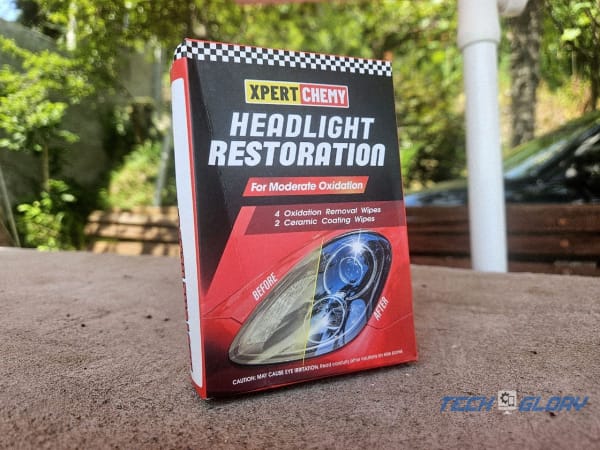
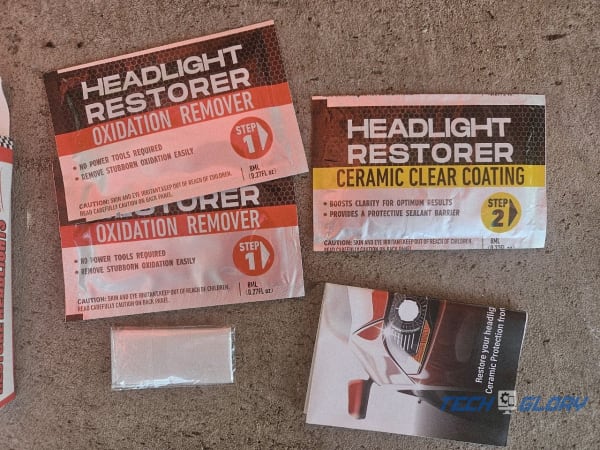
In many places, a basic headlight polish is cheap—around $10. But 90% of those quick services don't include a protective ceramic coating, making the repair temporary. That’s why I decided to tackle the restoration at home using a DIY kit I found on an online marketplace for just $5. The reason it’s so affordable is that instead of bulky chemical bottles, the kit provides smart, single-use wipes infused with an oxidation remover and a ceramic protective coating.
The Restoration Process
Before jumping into the chemicals, prepping the headlight surface is crucial. Don't skip this, or your results will suffer. My kit didn't include wet/dry sandpaper, but you can pick some up cheaply at any local auto parts or hardware store. You’ll need grits ranging from 400, 600, 800, 1000, 1500, up to 2000.
Sanding (The Prep): If your headlights are heavily yellowed or deeply pitted, start with 400-grit paper. Spray plenty of water on the lens and sand in steady horizontal motions. Next, switch to 600-grit and sand in vertical motions to remove the scratches left by the 400-grit. Keep increasing the grit up to 2000, alternating directions, and keeping the surface wet. Once rinsed and wiped down, the lens should look evenly matte and foggy. If some areas still look clear, they need more sanding.
Oxidation Removal: Open the oxidation removal wipe provided in the kit and wipe down the entire lens. You’ll immediately see the plastic turn crystal clear! Let the solution sit for about 30 to 60 seconds—no longer, as leaving strong chemicals on plastic for too long can cause damage. Immediately wipe it dry with a clean paper towel or microfiber cloth. Pro Tip: Tape off the surrounding paint with painter's tape beforehand so the chemicals don't touch your car’s bodywork.
Applying the Ceramic Coat: After wiping off the oxidation remover, the headlight will temporarily look slightly foggy again—don't panic, this is normal. Ensure the surface is completely dry and dust-free. Open the ceramic coating wipe and apply it gently in smooth, overlapping horizontal strokes from top to bottom. Do not wipe this off! Let it air dry to form the protective shell
Crucial Tips for Long-Lasting Results
To ensure all your hard work doesn't go to waste, keep these environmental factors in mind:
Pick the Right Weather: You’ll need a clear, sunny day so the ceramic coating can cure properly over the next 24 hours. However, do the actual application in the shade. Direct sunlight heating up the lens during the sanding and chemical application will ruin the finish.
Curing Time: Avoid driving the car for at least 12 hours after applying the ceramic coat. The coating needs ample time to harden completely. Driving too soon exposes the sticky, uncured layer to road dust, debris, and direct sunlight, which can peel or ruin the finish.
By following these steps, you’ll achieve crystal-clear, restored headlights fully protected by a fresh ceramic layer. I actually tackled this restoration while upgrading my headlights to modern LED bulbs—you can check out that installation guide right here : Car headlight restoration - DRL installation on Subaru Legacy BL5
